OctopusCodes - Android CMS
Description
Product Description
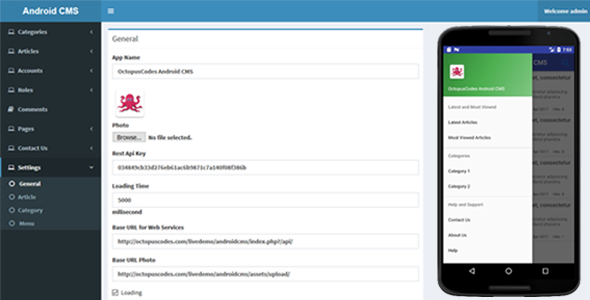
OctopusCodes Android CMS is a Mobile CMS System which run under Android platform that used for your own applications. With powerful and Responsive Admin Panel can manage categories, articles, app profile information, change admin username and password, etc. This application created by Android for client side and then PHP MySQL for Admin side. Run under Android platform which is the most popular operating system in the world. Using this application you can save your money and time in creating application for your own applications. OctopusCodes Android CMS has an easy administration page that gives you full control over categories, articles, accounts, roles, pages, comments, contact and settings.Android App Features
- Build in latest version of Android Studio
- Navigation Drawer with Header Image and App Name
- All data from App will load from Admin Panel
- Display Articles in Multiple Styles: Random, Latest and Mosted Viewed
- Pagination for Articles
- Search Articles
- Display Articles by Category
- Post and See Comments for Articles
- Display Sub Categories Multiple Styles: Listview and Gridview
- Easy Enable or Disable AdMob and StartApp ads
- Display Content of Pages
- Showing Progress Dialog
Admin Panel Features
- Manage Categories
- Manage Artiles
- Manage Comments
- Manage Contacts
- Manage Account
- Manage Roles
- Manage Pages
- App Setting
- Change Admin Profile
Live Demo
-
Download APK
OctopusCodesAndroidCMS.apk -
Front View Demo
Live Demo -
Admin Panel Demo
- Admin account for testing
- Live Demo
- Username: admin
- Password: 123
- Admin account for testing
Requirements
-
Server Requirements
- PHP 5.x
- MySQL 5.x
- Linux Hosting
-
Android App Requirements
- Android Studio
Install Application
-
Install Database on Hosting
Create new database on your hosting and run androidcms.sql file. Create database user and assign dbo rights to the user. -
Install Server
- Unzip Main.zip file and upload to your hosting.
- Open database.php file in serversource codesandroidcmsapplicationconfig foler
and change values of hostname, database, username and
password as below:
- hostname: your server name
- database: your database name
- username: your username
- password: your password
- Open config.php file in applicationconfig foler
and change value of base_url as below:
- $config[‘base_url’]: your domain name
- Run website and login with default account:
- Admin Panel (Admin access) URL: Username: admin Password: 123 Remember that you can change default admin URL in order to secure admin UI entry point.
- Change setting values from admin panel for app.
-
Install Android App
- Open RestUitl.java file from MainAndroidOctopusCodesAndroidCMS.
- Change setting values as below:
- BASE_URL: url access restful web services from server
- keyValue: value from general setting in admin panel
Product Support
If you have problems, questions, ideal, etc…Contact me via email octopuscodes@gmail.com Please contact us with any questions you may have via the contact form on my author profile page.Product Updates
- Free Updates
- 100% Support
History
- V1.0 Released – April 28, 2017
Categories
Tags
External listing. code.market does not sell this product and does not process payment for it. Pricing, payment, delivery, licensing, refunds, and support are handled by the third-party merchant on its own website. We may earn an affiliate commission from a referral. Details.
Products of the Week.
Submit#1

wanapi.app
Wan API is a developer platform for the Wan video model family. Compare Wan 3.0, Prime and Pro specifications and prices, then prepare a request in the preview playground.
Other · 8,567 views · 22 clicksOther · Week 42 · 8,567 views · 22 clicks
#2

wanapi.ai
Wan API is a developer platform for the Wan video model family. Compare Wan 3.0, Prime and Pro specifications and prices, then prepare a request in the preview playground.
Other · 7,911 views · 12 clicksOther · Week 42 · 7,911 views · 12 clicks
#3

yee.site
Your link in bio, but a real website. Start from beautiful templates and ready-made sections, then add a shop, bookings, a blog and as many pages as you need. Perfect for your link in bio, portfolio or personal site.
Other · 14,042 views · 24 clicksOther · Week 42 · 14,042 views · 24 clicks
#4

upvote.club
Free Social Media Engagement that Helps Boost Your Content. Upvote Club supports 19 social networks with 100+ engagement actions in one dashboard. Add links to your posts and get free engagement from real users.
SaaS · 34,934 views · 104 clicksSaaS · Week 42 · 34,934 views · 104 clicks
#5

Seenshot App
Free, Fast, MacOS Screenshot app. Make Screenshot cmd+shift+2 and send it via link
Desktop App · 23,423 views · 115 clicksDesktop App · Week 42 · 23,423 views · 115 clicks
#6

Conversational Backlinks for Busy Founders
Place Backlink Relevant Conversation for your domain across Forums and Conversations
Website · 35,191 views · 205 clicksWebsite · Week 42 · 35,191 views · 205 clicks
#7

Substack Posting API
Onboard your Agent to Substack. Write Publish on Substack via API
SaaS · 54,050 views · 190 clicksSaaS · Week 42 · 54,050 views · 190 clicks
#8

codester.com
SocialDesk+: Omnichannel Social Commerce & Business Management Platform This is stronger than simply “Social Commerce and Messaging” because it tells buyers this is a complete business platform, not just a messaging script. Turn Social Conversations Into Sales SocialDesk+ is a complete omnichannel social commerce and business management platform built for businesses that sell and communicate with customers through social media. Instead of switching between WhatsApp, Facebook, Instagram and TikTok, businesses can manage customer conversations, comments, products, leads, follow-ups, automation, teams and business reports from one professional workspace. And because the full source code is included, developers, agencies and entrepreneurs can customize, rebrand and launch SocialDesk+ as their own business solution or SaaS platform. 🚀 Build Your Own Social Commerce Business SocialDesk+ gives you the foundation to launch: - Your own SaaS platform - A white-label social CRM - A social-commerce management system - A customer communication platform - A business messaging solution - A custom solution for clients - A multi-business subscription platform 💬 Connect Your Customers Supported social channels include: WhatsApp • Facebook • Instagram • TikTok Bring supported conversations into one centralized workspace and help businesses respond faster without constantly switching between platforms. 🛍️ More Than a Messaging Platform SocialDesk+ combines communication with the tools businesses need to manage customer opportunities: Inbox Manage customer conversations from connected channels. Comments Monitor and respond to social-media comments. Customers & Leads Organize customer information and potential buyers. Products & Catalog Manage products and give your team quick access to product information. Follow-Ups Make sure potential customers don't get forgotten. Automation Automate repetitive customer questions and responses. AI Assistant Provide AI-assisted communication when configured. Team Management Give managers and staff access to the business workspace. Reports & Analytics Track activity using business reports and analytics. The current product listing already includes these capabilities. 🔥 Why Buyers Will Want It Launch Faster Start with an already-built business platform instead of developing the entire system from zero. Customize Everything The full source code is included, allowing developers to change branding, features, workflows and integrations. Build a SaaS Create multiple business workspaces and offer SocialDesk+ as a subscription-based service. Sell to Businesses Offer it to retailers, restaurants, service businesses, online sellers, agencies and other businesses that communicate with customers through social media. Mobile + Web + Backend This isn't just a mobile UI template. It includes: - Flutter mobile application - Python / FastAPI backend - Web interface - Administration tools - Database infrastructure - API-based architecture - SQLite / PostgreSQL support - Android and iOS project structure 💼 One Platform. Multiple Business Opportunities. For SaaS Entrepreneurs Launch your own subscription platform and allow multiple businesses to operate inside separate workspaces. For Software Agencies Customize and rebrand the platform for clients instead of building an omnichannel business system from scratch. For Developers Use the complete source code as a foundation for your own social-commerce or customer-management product. For Businesses Deploy a dedicated version for your own customer-service and social-commerce operations. 🧩 What's Included Mobile - Flutter / Dart - Android - iOS project Backend - Python - FastAPI - SQLAlchemy - Alembic Database - SQLite - PostgreSQL Web - HTML5 - CSS3 - JavaScript Deployment - Docker - Docker Compose - Production configuration Business Platform - Multi-workspace architecture - Authentication - Teams - Customers - Products - Messaging - Comments - Automation - Reports - Subscriptions - Administration The current listing also documents third-party integrations such as Meta, TikTok, Stripe, Firebase, SMTP and optional OpenAI configuration. ⚡ What Makes SocialDesk+ Different? You're not buying a simple: ❌ Chat UI ❌ WhatsApp clone ❌ Flutter template ❌ Admin dashboard ❌ Basic CRM You're getting a complete business platform foundation that can be customized, branded and commercialized. Connect. Automate. Manage. Grow. SocialDesk+ Omnichannel Social Commerce & Business Management Platform One important change I'd make to the current listing The current page starts with: “A simple guide to managing your social conversations, customers, products and business activity.”
Other · 21,414 views · 35 clicksOther · Week 42 · 21,414 views · 35 clicks
#9

sandbook.app
Sandbook reads EPUB, PDF, web pages and scanned pages aloud with Kokoro TTS, an open neural voice model that runs on your iPhone, free and offline. Choose from 41 natural voices in English, Spanish, French, Italian, Brazilian Portuguese and Hindi and follow each word as it is spoken. Try the same voices in your browser first with the free Kokoro TTS online demo.
Other · 21,307 views · 18 clicksOther · Week 42 · 21,307 views · 18 clicks